One of some free tools that you can use is Search console. This service is provided free of charge by Google. This service formerly named Google webmaster tools.
What is Search console?
Search console or Google webmaster tools is a free service that can help you to monitor your site, maintain your site and see how Google crawl your web page or blog. Then your blog pages appear in Google search results.
How to get Google search console account
You can sign in to Google webmaster by using your Google account. If you don’t have any Google account, then you can sign up first.
How to add your blog or website into Google search console
First step, go to www.google.com/webmasters and sign in by using your Google account. Then you click “ADD A PROPERTY”.
Second steps. Add your blog or website address and click the continue button. If your blog is a BlogSpot (from blogger platform) then you don’t need to verify. However, if it is a top level domain (such as yourdomain.com), then you have to verify the ownership.
How to verify your site in Google search console
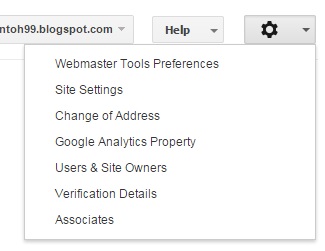
First steps, you sign in to Google webmaster and then select your blog/website. Next, you click the gear icon and select “Verifications details”.
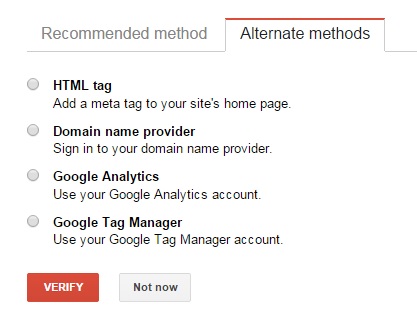
Second steps, you click “Alternate methods” and next you select HTML tag. You copy the Meta tag code and paste it into your blog/site. More precisely, paste the Meta tag code into the <head> section.
How to test and submit a sitemap in Google search console
Sitemap will help web crawler (such as Googlebot) to learn more about your site's organization. Therefore, you have to submit your site’s sitemap to lets Google get the information of your site properly which are provided in sitemap.
Sign in to Google webmaster and select a site that you want to manage. Next, you see the left panel. Then you click “Crawl” and follow by clicking “Sitemap”.
Next steps, you click the “ADD/TEST SITEMAP” button and then you enter the URL path of sitemap into the textbox. At last, you can select to test or submit the sitemap.
How to use fetch as Google and tell to Googlebot to crawl your page
If you need a tool to diagnose your web page, then you can use "Fetch as Google". By using "Fetch as Google" you can know how Googlebot fetch and see your page. Moreover, you also can see how visitors see your pages. Get the direction how to use these tools bellow!
First, go to the Google search console dashboard and select a site that you want to manage. Then click "Crawl" and select “fetch as Google”. Complete the path of URL that you want Googlebot to retrieve and then you click “Fetch” or “Fetch and Render”.
Use Data Highlighter tool
If your web page’s content has a structure, then you can highlight the data in your webpage. For example, Your web page containing article and have structured data, such as Title, required , author, Date published, picture, Category, rating etc.
To start highlight the data then you go to Google search console dashboard and select site. Then you click “Search Appearance” on the left panel and select “Data Highlighter”. At last, you click the start highlighting’s button.
Beside tools that I have mentioned above, there are many more tools that are available in the Google search console. You can visit the search console help’s page to get more help.
No comments:
Post a Comment